Carmelitas

Carmelitas are the perfect dessert for anyone craving the combination of chewy, decadent flavors and textures that make every bite feel like a warm hug. Picture layer upon layer of rich, gooey caramel enveloped in a comforting blanket of chocolate chip cookie dough—the kind of dessert that invites you to savor life’s little moments. When I first stumbled upon this recipe, it was during a cozy Saturday afternoon when the sweetness of something homemade felt just right.
Table of Contents
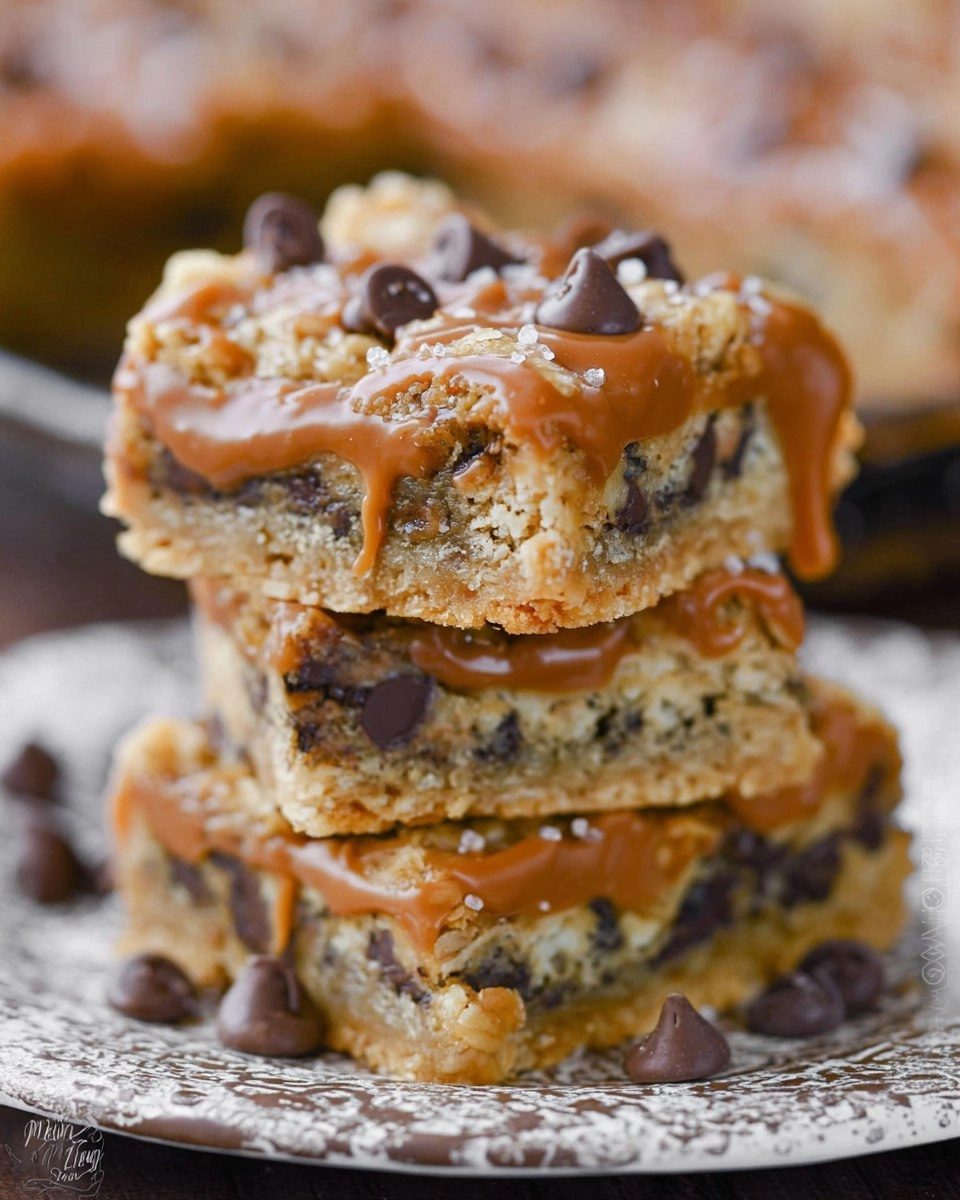
What sets Carmelitas apart is their balance of flavors and textures. The buttery cookie dough gives way to a sweet, sticky caramel layer, all harmonized by rich semi-sweet chocolate chips. This recipe proves incredibly easy to follow, making it a breeze for bakers of all levels. With just a handful of ingredients and minimal effort, you will find yourself crafting these delightful bites for any occasion—be it a casual family gathering or a sweet treat after a long day. I genuinely encourage you to try making these: they’re bound to become a go-to dessert that you will cherish, much like I do.
Why You’ll Love This Recipe
- Simple & Quick: With a total prep and bake time of about 40 minutes, you can whip these up in no time.
- Irresistible Flavor: Each layer features creamy caramel with bursts of semi-sweet chocolate—what’s not to love?
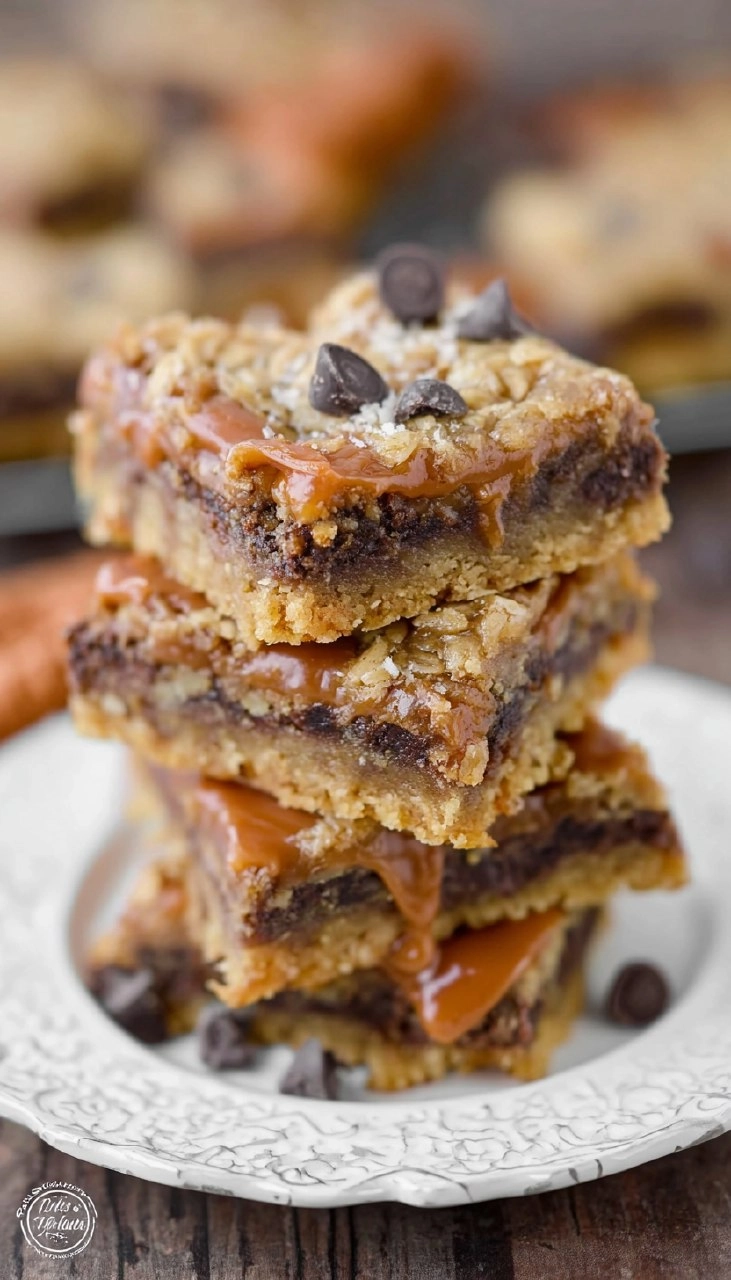
- Eye-Catching Appeal: The contrasting layers and the whimsical crumble topping make these treats as pleasing to the eye as they are to the palate.
- Flexible Serving: Enjoy them as a dessert at dinner, a midday snack, or even a sweet breakfast treat when paired with coffee!
- Diet-Friendly Options: Feel free to substitute with gluten-free cookie dough to cater to your dietary needs.
Ingredients You’ll Need
- 30 ounces chocolate chip cookie dough: Use any store-bought refrigerated dough or homemade if you prefer that fresh-baked taste, as it’s the foundation of this recipe.
- 11 ounces caramels: Wrapped caramels work best. The gooey texture melts beautifully, creating that signature caramel layer.
- ¼ cup evaporated milk: This helps to create a smooth caramel sauce—don’t try to substitute with regular milk, as it doesn’t yield the same result.
- 1 cup semi-sweet chocolate chips: Opt for high-quality chocolate chips to ensure a richer flavor in every bite.
How to Make Carmelitas
- Preheat the Oven: Start off by preheating your oven to 350°F (this ensures that your Carmelitas bake evenly).
- Prepare the Base: Slice a little more than half of the 30 ounces of cookie dough into 1/4″ rounds. Place these in an even layer in a parchment-lined 9-inch square baking pan. Use your fingers to press the dough down until it forms a solid base.
- Bake the Base: Bake the cookie layer for 20 to 25 minutes, just until it’s golden brown. Once it’s out of the oven, let it cool slightly.
- Make the Caramel: Take your unwrapped caramels and combine them with ¼ cup of evaporated milk in a microwave-safe bowl. Heat it in the microwave on high for one minute. Stir, then continue heating in 30-second intervals until everything is completely melted and smooth.
- Add Chocolate Chips: Once your cookie base has cooled a bit, sprinkle 1 cup of semi-sweet chocolate chips evenly over the top.
- Drizzle Caramel: Carefully drizzle the melted caramel mixture over the chocolate chips, allowing it to spread slightly.
- Top with Remaining Dough: Crumble the remaining dough (less than half) over the caramel layer. It doesn’t need to be perfect; the rustic look only adds to the charm.
- Bake Again: Return the pan to the oven and bake for another 12-15 minutes or until the edges are just beginning to turn golden brown.
- Cool and Refrigerate: Let the Carmelitas cool to room temperature, and then refrigerate for at least 2 hours. This helps everything set perfectly.
- Serve: Sit out for about 15 minutes before cutting and serving for the ideal texture.
Storing & Reheating
To store your Carmelitas, keep them at room temperature in an airtight container for about 3 days. If you want to prolong their life, refrigerate them for up to a week. For longer storage, they freeze well; just wrap them tightly in plastic wrap and place them in a freezer-safe container for up to 3 months. When you’re ready to enjoy them, you can reheat in the microwave for about 10-15 seconds, which will slightly soften the caramel again. Note that freezing might change the texture slightly, but a quick reheat can help refresh the flavors!
Chef’s Helpful Tips
- Make sure to let the cookie base cool before adding the caramel to maintain layers.
- Avoid overbaking, as they should remain chewy—look for the edges settling while the center is slightly soft.
- You can substitute store-bought dough with homemade cookie dough for a personalized touch, just remember to stick to the measurements closely.
- If you find the caramel is a bit too thick, adding a touch more evaporated milk while heating can help smooth it out.
- If you love nuts, consider adding chopped pecans or walnuts with the chocolate chips for a fun twist.
There’s something purely delightful about Carmelitas, combining a buttery, cookie-like crust with a luscious topping of ooey-gooey caramel and a creamy layer of chocolate chips. The balance of flavors is simply irresistible, and they come together so effortlessly! Don’t shy away from experimentation—feel free to tweak the proportions or add your favorite flavors.
Whether you’re sharing these sweet treats at a gathering or indulging alone with a cup of coffee, each bite is a delightful experience. I can’t wait for you to try this indulgent recipe!
Recipe FAQs
Can I use a different type of chocolate?
Absolutely! If you prefer dark chocolate or even white chocolate, feel free to substitute. Each variation will bring its unique flavor profile to the Carmelitas, making them distinctly your own.
How do I prevent my caramel layer from hardening?
To maintain the gooeyness of your caramel layer, make sure to use evaporated milk. Additionally, keep your Carmelitas stored in an airtight container at room temperature to maximize softness.
Can I make these ahead of time?
Yes! Carmelitas can be made a day ahead and stored in the fridge. Just make sure to allow them to sit out for a bit before serving, so they come to a perfect temperature that enhances their flavors and textures.
What’s the best way to slice them?
For clean slices, use a sharp knife dipped in warm water to cut through the layers. This technique helps prevent sticking and ensures a tidy presentation when serving your delicious Carmelitas.
PrintMore Desserts & Appetizers Recipes
- Raspberry Nutella Heart Pies
- Strawberry Rhubarb Pie
- Cheeseburger Sliders | Easy Crowd-Pleasing Memorial Day Appetizer
- Caramel Rice Krispie Treats
- Apple Zucchini Bread
Did You Enjoy Making This Recipe? Please rate this recipe with ⭐⭐⭐⭐⭐ or leave a comment.
📖 Recipe Card
Carmelitas
- Prep Time: 5 minutes
- Cook Time: 40 minutes
- Total Time: 45 minutes
- Yield: 16 servings 1x
- Category: Desserts & Appetizers
- Method: Baking
- Cuisine: American
Description
Carmelitas are a delicious blend of chocolate chip cookie dough and rich caramel, creating an irresistible dessert that’s quick to prepare and perfect for sharing with friends and family.
Ingredients
- 30 ounces chocolate chip cookie dough, refrigerated, store-bought dough, or homemade
- 11 ounces caramels
- ¼ cup evaporated milk
- 1 cup semi-sweet chocolate chips
Instructions
- Preheat your oven to 350°F (175°C).
- Take a little more than half of the cookie dough and slice it into 1/4" rounds; arrange these in a single layer in a parchment-lined 9-inch square baking pan.
- Press the dough down into a solid, even layer.
- Bake for 20 to 25 minutes, or until golden brown. Remove from the oven and let cool slightly.
- In a microwave-safe container, combine the unwrapped caramels and evaporated milk. Heat on high for 1 minute; stir and heat in additional 30-second intervals until melted.
- Sprinkle chocolate chips evenly over the slightly cooled cookie crust.
- Drizzle the melted caramel mixture on top of the chocolate chips.
- Crumble the remaining cookie dough over the caramel layer; it doesn't need to be perfect.
- Return the pan to the oven and bake for another 12 to 15 minutes, just until golden brown.
- Allow to cool to room temperature, then refrigerate for at least 2 hours before cutting into squares.
Notes
For a richer flavor, use homemade chocolate chip cookie dough.
Feel free to add nuts for extra texture and taste.
Make sure to let them sit at room temperature for 15 minutes before cutting for easier serving.
Nutrition
- Serving Size: 1 bar
- Calories: 210
- Sugar: 14g
- Sodium: 150mg
- Fat: 10g
- Saturated Fat: 4g
- Unsaturated Fat: 6g
- Trans Fat: 0g
- Carbohydrates: 28g
- Fiber: 1g
- Protein: 2g
- Cholesterol: 30mg