Red White and Blue Dirt Cups

Red White and Blue Dirt Cups are the perfect blend of nostalgia and celebration, particularly when you’re looking for a fun dessert that captures the spirit of summer festivities. These delightful cups bring together layers of luscious white chocolate pudding, crushed chocolate cookies, and vibrant red and blue colors, making them an irresistible treat for the 4th of July or any patriotic occasion. Not only do these cups bring flavor, but they also embody the festive spirit in a way that store-bought desserts simply can’t compete with!
Table of Contents
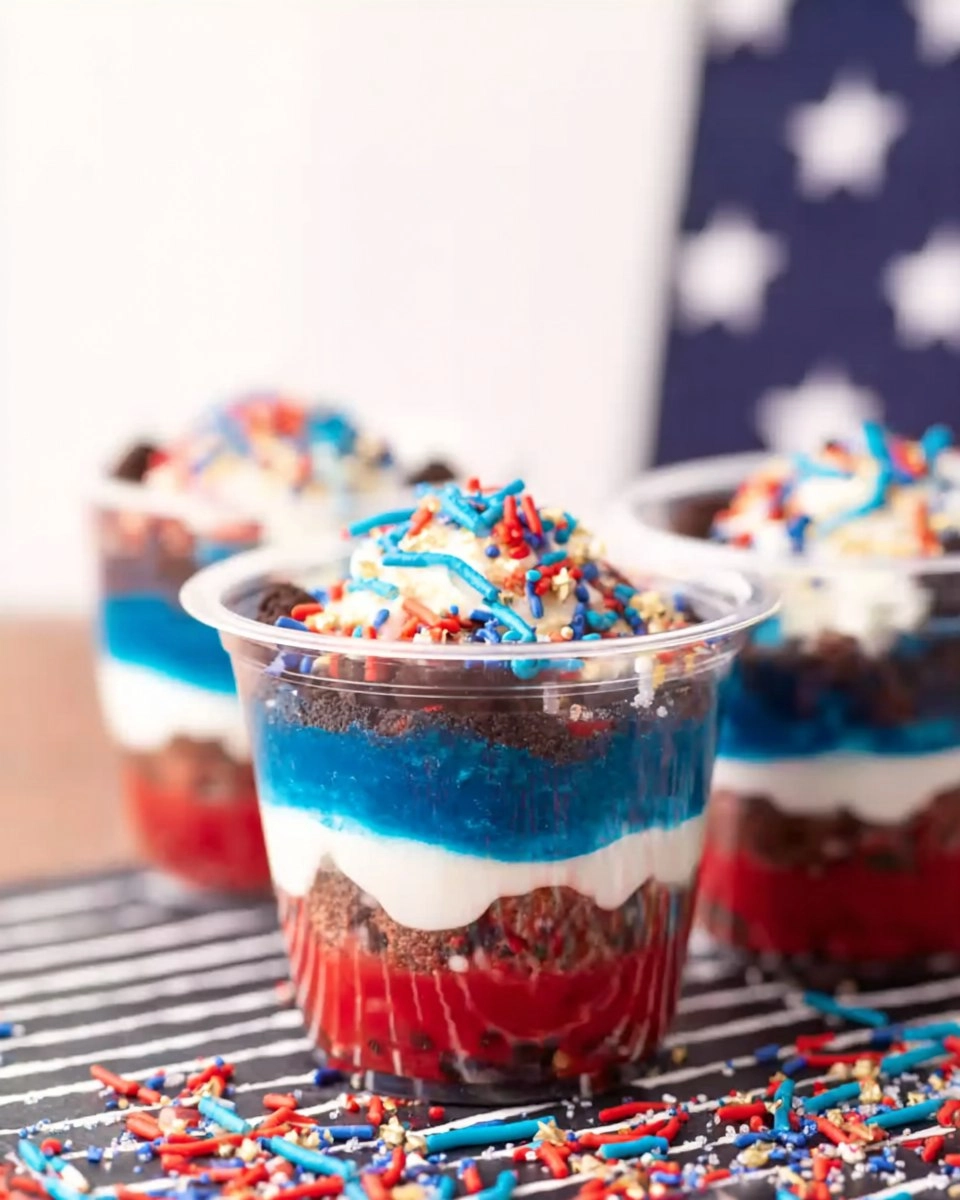
I remember the first time I discovered these Red White and Blue Dirt Cups; it was at a family gathering during Independence Day. Everyone gathered around the dessert table, eyes wide with anticipation as I unveiled this colorful creation. Each layer was a surprise, and the mixture of textures had everyone coming back for more. What makes this recipe so special is its simplicity—no baking required! It’s a quick, fuss-free way to add a touch of fun to your summer gatherings, and I promise, these cups will be a hit with both kids and adults alike.
Why You’ll Love This Recipe
- Simple & Quick: These no bake 4th of July dirt cups can be whipped up in about 30 minutes, making them a last-minute lifesaver!
- Irresistible Flavor: The rich chocolate cookie base paired with creamy white chocolate pudding creates a delicious, decadent flavor.
- Eye-Catching Appeal: The vibrant red and blue layers combined with sprinkles and gummy stars make for a visually impressive dessert that’s perfect for any gathering.
- Flexible Serving: Whether it’s a backyard barbecue or a picnic, these dirt cups are ideal for any occasion, and they are easily portable!
- Kid-Friendly Activity: Get the little ones involved in constructing their own cups; it’s fun and allows for some delicious creativity.
Ingredients You’ll Need
13.9 ounces chocolate sandwich cookies: These provide the classic “dirt” layer. You can use Oreos or any chocolate sandwich cookies you prefer. For gluten-free options, substitute with gluten-free chocolate cookies.
4 cups cold milk: This is the base for your pudding. Make sure it’s cold for the best results when mixing with the pudding.
Two 3.4-ounce boxes instant white chocolate pudding mix: Instant is the way to go; it sets up quickly and creates a creamy texture that pairs wonderfully with the chocolate layers.
1 (8 ounce) container whipped topping (thawed): This adds airiness to the pudding and helps create that luscious layered effect.
Festive sprinkles: These add color and fun! Choose star shapes or red, white, and blue mixes for a more patriotic touch.
Gummy stars: These adorable toppers are a fun addition that kids will love. You can substitute with any star-shaped candy or edible decorations.
Red and blue food coloring: Use this to color your pudding and enhance its festive appearance. Gel food coloring works best as it provides vibrant color without watering down the pudding.
8 (9 ounce) disposable cups: Perfect for serving and makes clean-up a breeze. Feel free to use mason jars or clear cups to show off those beautiful layers!
How to Make Red White and Blue Dirt Cups
Crush the Cookies: Start by crushing the chocolate sandwich cookies into small crumbs. Use a food processor for a fine consistency, or place them in a Ziploc bag and crush them with a rolling pin for a more hands-on approach.
Prepare the Pudding Mixture: In a large bowl, whisk together 4 cups of cold milk and the two boxes of instant white chocolate pudding mix. Mix until it’s smooth and creamy—this should take about 2 minutes.
Divide the Pudding: Once your pudding mixture is ready, separate it evenly into three bowls.
Color the Pudding: In one bowl, add a few drops of red food coloring and mix until you achieve your desired shade. In another bowl, do the same with blue food coloring. Leave the third bowl in its pristine white state.
Fold in Whipped Topping: Now, divide the 8-ounce container of thawed whipped topping evenly into the three bowls and gently fold it in until well combined. This gives the pudding a light, fluffy texture.
Layer the Ingredients: Grab your 9-ounce disposable cups and start layering! Begin with a spoonful of cookie crumbs at the bottom, followed by a layer of blue pudding, more cookie crumbs, a layer of white pudding, more cookie crumbs, then the red pudding. Finish with a final layer of cookie crumbs on top.
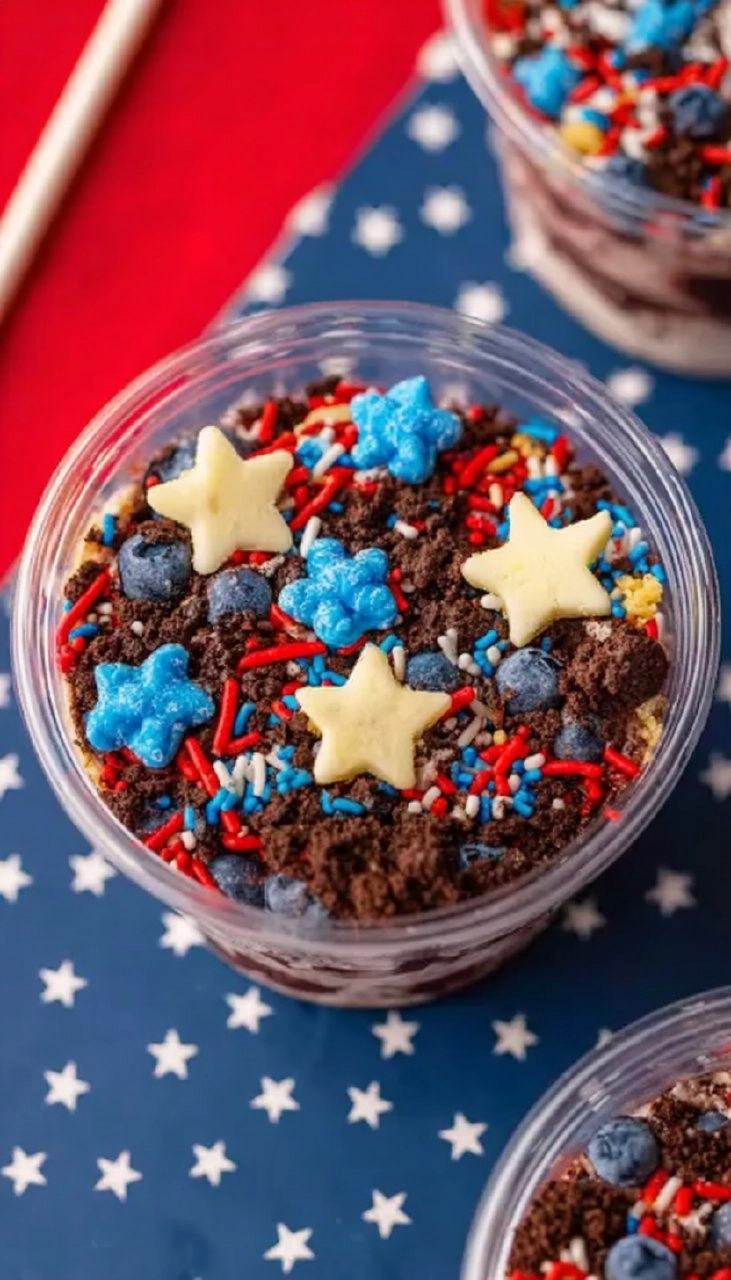
Decorate: Top your dirt cups with festive sprinkles and gummy stars for that extra pop of color and fun.
Chill & Serve: Let your Red White and Blue Dirt Cups chill in the refrigerator for at least an hour before serving. This helps all those delicious flavors meld together beautifully.
Storing & Reheating
These delightful dirt cups are best enjoyed fresh. However, you can store any leftovers in the refrigerator for up to 3 days, covered with plastic wrap or in an airtight container. Unfortunately, freezing isn’t recommended due to the whipped topping, which may alter in texture once thawed. If you need to assemble them in advance, prepare all the layers separately and combine right before serving for the best texture!
Chef’s Helpful Tips
- Make sure your whipped topping is completely thawed before adding it to the pudding; this ensures a smooth texture when mixed.
- If your pudding mixture is too thick, it may be due to overmixing; simply add a touch more milk to loosen it up.
- For added texture, include layers of chopped fresh berries along with the pudding and cookie layers.
- You can prepare these dirt cups a day beforehand. Just layer them up, cover, and let them chill overnight for a convenient treat!
- Experiment with different flavors of pudding if you like. Chocolate, vanilla, or even strawberry could be delightful variations.
As you gather your loved ones to celebrate under the summer sky, these festive Red White and Blue Dirt Cups will surely become a favorite. The layers of flavor and vibrant colors not only make this dessert a feast for the eyes but a delicious treat for the taste buds. Enjoy this no bake 4th of July dessert and make it a part of your family traditions!
Recipe FAQs
Can I use a different flavor of pudding mix?
Absolutely! While this recipe uses white chocolate pudding, you can easily substitute it with your favorite flavor, such as vanilla or even chocolate for a double chocolate effect. Just be mindful of how the flavors will pair with the chocolate cookie crust!
How long can I store these cups in the fridge?
You can store the dirt cups in the refrigerator for up to 3 days. Just be sure to keep them covered to prevent any drying out or absorption of fridge odors. However, scooping them soon after making is highly recommended for the best texture!
Are there any alternatives to whipped topping?
Yes! If you’re looking for a lighter option, you can use homemade stabilized whipped cream or Greek yogurt for a tangy twist. Keep in mind that this will change the texture and sweetness, but it’s a great way to customize the recipe to your preferences.
Can I make these in advance?
Definitely! You can prepare the layers a day ahead and assemble them just before serving. This allows the flavors to meld beautifully, making them even tastier! Just be sure to keep the layers stored separately until you’re ready to layer them in cups.
PrintMore Desserts & Appetizers Recipes
- Caramel Apple Trifles
- Chocolate Ice Cream
- Chocolate Chip Cookies | Classic Soft Chewy Cookies
- Fall Party Mix
- Peach Preserves
Did You Enjoy Making This Recipe? Please rate this recipe with ⭐⭐⭐⭐⭐ or leave a comment.
📖 Recipe Card
Red White and Blue Dirt Cups
- Prep Time: 20 minutes
- Cook Time: 30 minutes
- Total Time: 50 minutes
- Yield: 5 servings 1x
- Category: Desserts & Appetizers
- Method: Layering
- Cuisine: American
Description
Red White and Blue Dirt Cups are a fun and easy dessert featuring layers of chocolate cookies, creamy white chocolate pudding, and colorful toppings. Perfect for celebrations or just a sweet treat!
Ingredients
- 13.9 ounce pack of chocolate sandwich cookies
- 4 cups cold milk
- 2 (3.4 ounce) boxes instant white chocolate pudding mix
- 1 (8 ounce) container whipped topping thawed
- Festive sprinkles
- Gummy stars
- Red and blue food coloring
- 8 (9 ounce) disposable cups
Instructions
- Crush the chocolate sandwich cookies using a food processor or by placing them in a Ziploc bag and crushing them.
- In a large bowl, whisk the cold milk and instant white chocolate pudding mix until smooth and creamy.
- Divide the pudding mixture equally into three bowls.
- Add red food coloring to one bowl and blue food coloring to another bowl.
- Divide the whipped topping among the three bowls and stir to combine.
- In each 9-ounce disposable cup, layer the cookie crumbs, blue pudding, cookie crumbs, white pudding, cookie crumbs, red pudding, and finish with a layer of cookie crumbs.
- Top each cup with festive sprinkles and gummy stars.
Notes
For a more colorful effect, add extra sprinkles or decorations to the tops of the cups.
These cups can be prepared ahead of time and stored in the refrigerator until serving.
Feel free to adjust the amount of food coloring based on your desired color intensity.
Nutrition
- Serving Size: 1 cup
- Calories: 300
- Sugar: 25g
- Sodium: 120mg
- Fat: 10g
- Saturated Fat: 5g
- Unsaturated Fat: 4g
- Trans Fat: 0g
- Carbohydrates: 46g
- Fiber: 2g
- Protein: 4g
- Cholesterol: 15mg