Vanilla Bean Cheesecake

Nothing quite compares to the smooth, creamy indulgence of a homemade vanilla bean cheesecake. This dessert captures luxury in every bite, boasting an irresistibly silky texture and rich, aromatic flavor brought forth by real vanilla beans. With a buttery Nilla wafer crust complementing the filling, each slice is a little piece of heaven. Whether you’re celebrating a special occasion or simply satisfying a sweet craving, this magnificent Vanilla Bean Cheesecake is sure to impress family and friends alike.
Table of Contents
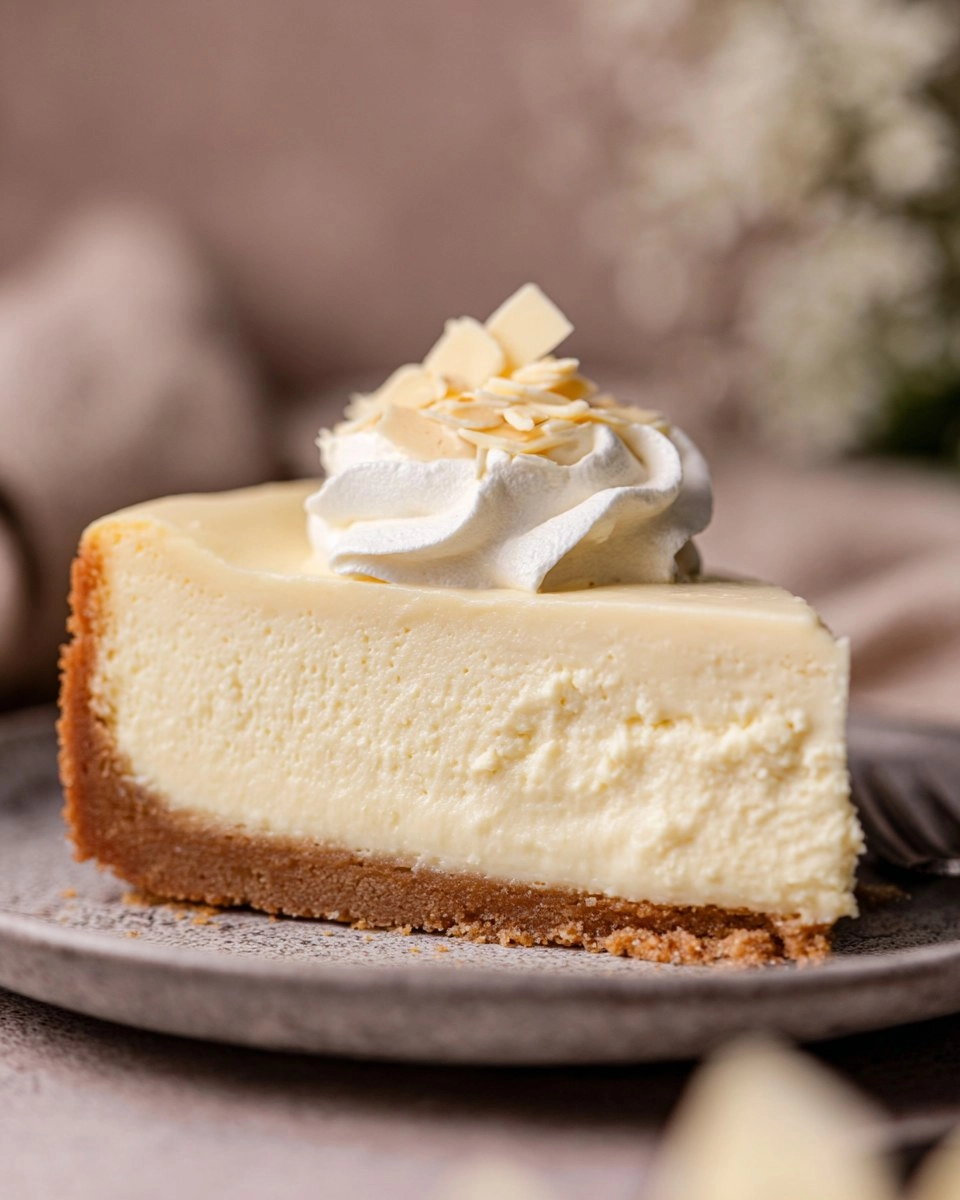
I remember the first time I made this cheesecake; it was a rainy Sunday afternoon. I had all the ingredients ready, but I honestly wasn’t sure how it would turn out. As the cheesecake baked, my kitchen filled with a heavenly aroma, and I couldn’t resist taking a peek through the oven door. The anticipation was palpable. When I finally tasted that first slice, I couldn’t believe how elegant and flavorful it was. From that day on, this recipe became a staple in my dessert repertoire and a go-to for gatherings. I’m genuinely excited to share this Vanilla Bean Cheesecake with you, and I hope it brings as much joy to your table as it has to mine.
Why You’ll Love This Recipe
- Simple & Quick: With just a few simple steps, you’ll create a dessert that looks and tastes fancy without the fuss.
- Irresistible Flavor: The real vanilla bean paste gives this cheesecake a deep, aromatic flavor that store-bought versions simply can’t match.
- Eye-Catching Appeal: The creamy filling and velvety whipped topping make for a stunning presentation that’s sure to wow guests.
- Flexible Serving: Perfect for just about any occasion, whether it’s a cozy dinner party or a special holiday feast.
- Diet-Friendly Options: Easily adaptable for gluten-sensitive guests by swapping in gluten-free cookies for the crust.
Ingredients You’ll Need
- 11 oz Nilla Wafers: These provide a buttery, sweet base for the cheesecake. If you prefer, you can use graham crackers or gluten-free cookies as an alternative.
- 1/2 cup Unsalted butter, melted: This binds the crust ingredients together. Make sure it’s melted, but not hot.
- 24 oz Cream cheese, room temperature: Cream cheese gives the cheesecake its rich, creamy texture. Ensure it’s at room temperature for smooth mixing.
- 3/4 cup White granulated sugar: This sweetens the cheesecake without overpowering the vanilla flavor.
- 1 Tbsp Vanilla bean paste: Offers an intense vanilla flavor and speckles of real vanilla beans. If you don’t have it, vanilla extract can be used, but the paste provides a more potent flavor.
- 1/2 cup Sour cream, room temperature or Greek yogurt: Adds creaminess and a slight tang. Use Greek yogurt for a lighter option.
- 1/4 cup Heavy cream, room temperature: Adds richness and smooths out the cheesecake.
- 4 Large eggs, room temperature: Eggs help set the cheesecake. Bring them to room temperature for better emulsification.
- 4 oz Cream cheese (extra, room temperature): Used in the topping for creaminess.
- 4 oz White chocolate bar (I used Lindt): This introduces a luxurious sweetness; you can substitute with dark chocolate for a different flavor profile.
- 2 Tbsp Heavy cream: To help with the consistency of the white chocolate mixture.
- 1 cup Heavy cream: For making delicious whipped cream to top your cheesecake.
- 1/4 cup Powdered sugar: Sweetens the whipped cream without adding granularity.
- 1 tsp Vanilla bean paste: Reinforces that rich vanilla flavor in the whipped cream.
How to Make Vanilla Bean Cheesecake
Preheat the Oven: Begin by preheating your oven to 325℉. Spray a 9-inch springform pan with nonstick baking spray and line the bottom with a circle of parchment paper — then spray it again for good measure.
Prepare the Crust: Using a food processor, pulse the Nilla Wafers until they turn into fine crumbs. In a separate bowl, combine the crumbs with the melted butter and mix with a fork until well combined.
Form the Crust: Pour the crumb mixture into the prepared pan and use your hands to press the mixture firmly into the bottom and halfway up the sides of the pan. A measuring cup helps compact the crust evenly.
Bake the Crust: Bake the crust for about 11 minutes, until lightly golden. While it bakes, prepare the water bath.
Set Up the Water Bath: You can use one of two methods: First, place your springform pan in a larger cake pan and fill the pan with hot water halfway up the sides of the springform. Alternatively, wrap the springform pan tightly in aluminum foil and place it in a roasting pan filled with hot water halfway up.
Make the Filling: In a large mixing bowl, beat the cream cheese and granulated sugar on high speed for 2 minutes until smooth. Scrape down the sides of the bowl midway through.
Add the Cream and Eggs: Mix in the sour cream, heavy cream, and vanilla bean paste, blending on medium speed until combined. Finally, add the eggs one at a time on low speed until just combined. Pour this decadent batter over your cooled crust.
Bake the Cheesecake: Carefully place the cheesecake into the oven and bake for 55-65 minutes. You want the edges to be set, but the center should still jiggle slightly when you gently shake it.
Cool the Cheesecake: After baking, turn off the oven, crack the door open, and let the cheesecake cool in the oven for another 30 minutes. This gradual cooling helps prevent cracking.
Chill the Cheesecake: Once cooled, transfer the cheesecake to a wire rack and cool completely at room temperature. Wrap it in foil and chill in the fridge for at least 6 hours or, ideally, overnight.
Prepare the Topping: In a small mixing bowl, use a hand mixer to beat the extra cream cheese with the melted white chocolate and 2 Tbsp heavy cream until smooth and creamy.
Make Whipped Cream: In a large metal bowl, beat 1 cup of heavy cream with 1/4 cup powdered sugar and 1 tsp vanilla bean paste until stiff peaks begin to form. Gently fold in the white chocolate mixture until fully incorporated.
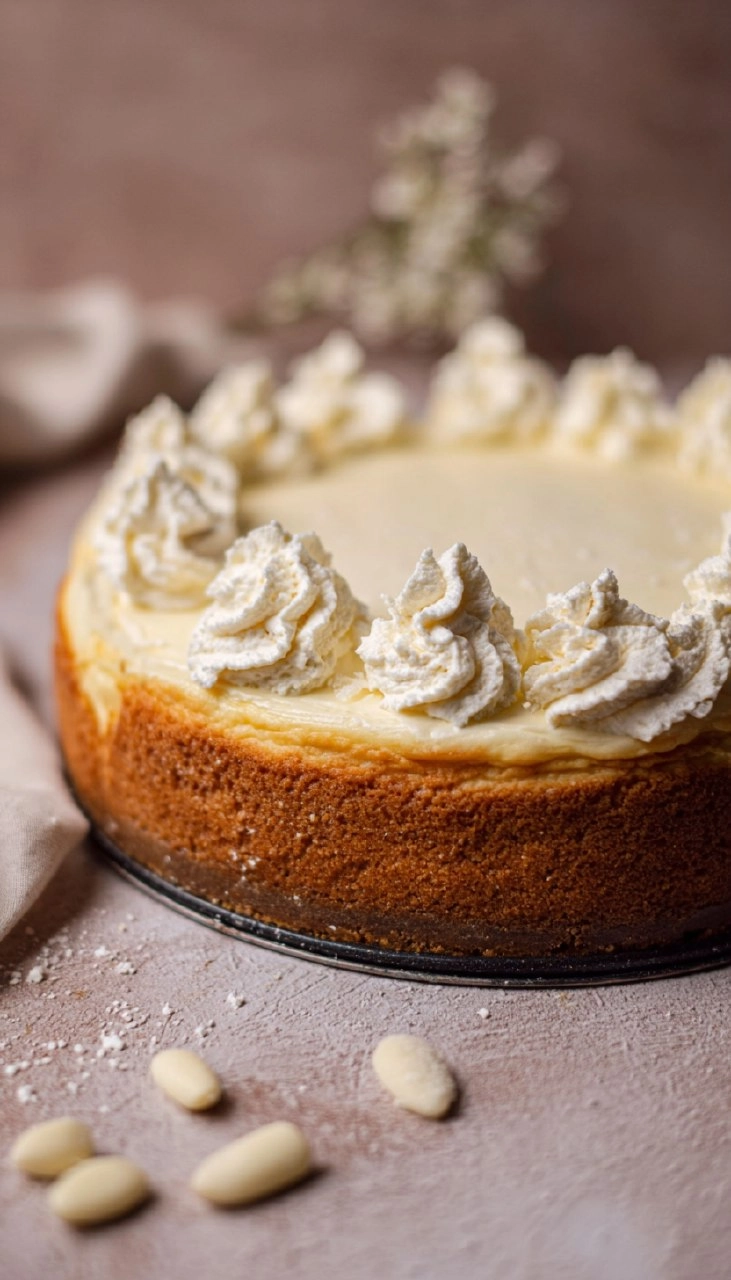
Decorate the Cheesecake: Carefully remove the cheesecake from the springform pan and peel away the parchment paper. Spread the white chocolate mousse over the top of the cheesecake evenly.
Pipe Whipped Cream: For an elegant finish, use a piping bag fitted with a Wilton 1M tip to create dollops of whipped cream around the edge or in the center of your cheesecake.
Serve and Enjoy: Your Vanilla Bean Cheesecake is now ready to serve! Slice, serve, and watch your guests savor every bite.
Storing & Reheating
To store your cheesecake, keep it covered in the refrigerator for up to 5 days. Use an airtight container or plastic wrap. If you wish to freeze it, wrap it tightly in plastic wrap and then in aluminum foil; it will maintain its best quality for up to 3 months. You can thaw it in the fridge overnight. While texture may vary slightly after freezing, you can refresh it by topping with fresh whipped cream before serving.
Chef’s Helpful Tips
- Ensure all ingredients are at room temperature for even mixing and to prevent lumps.
- Watch the baking time closely; every oven is different, and an overcooked cheesecake may crack.
- Avoid opening the oven door during cooking, as this can cause the cheesecake to sink.
- Consider using a cake lifter to transfer the cheesecake; removing it carefully prevents cracks.
- Experiment with different flavors by substituting the white chocolate with milk or dark chocolate to diversify the recipe.
There’s something wonderfully satisfying about crafting a Vanilla Bean Cheesecake from scratch. Not only does this dessert deliver an elegant finish to any meal, but it also invites creativity with toppings and variations. I encourage you to experiment, perhaps with berries or drizzles of caramel, to tailor it to your tastes. Each bite is a celebration of flavor, leaving your guests returning for seconds (or thirds).
Recipe FAQs
Can I make this cheesecake ahead of time?
Absolutely! In fact, this cheesecake tastes better when made a day in advance. Refrigerating allows the flavors to meld and enhance the overall taste. Just make sure you store it properly to avoid any off-flavors.
What’s the best way to slice a cheesecake?
For neat slices, allow the cheesecake to set in the fridge for several hours. Use a sharp, hot knife—dipped in hot water and then dried—to cut through without dragging or tearing the delicate crust.
Can I substitute the cream cheese?
You can swap cream cheese for mascarpone or even a lactose-free option if you wish to cater to dietary restrictions. However, keep in mind that cream cheese gives the classic tanginess and texture traditional cheesecakes are known for.
Why is the water bath important?
A water bath, or bain-marie, helps maintain even baking temperature around the cheesecake, preventing it from cracking while ensuring the interior sets properly without becoming rubbery. It’s a little extra effort for a perfectly creamy dessert!
PrintMore Desserts & Appetizers Recipes
Did You Enjoy Making This Recipe? Please rate this recipe with ⭐⭐⭐⭐⭐ or leave a comment.
📖 Recipe Card
Vanilla Bean Cheesecake
- Prep Time: 60 minutes
- Cook Time: 60 minutes
- Total Time: 2 hours
- Yield: 16 servings 1x
- Category: Desserts
- Method: Baking
- Cuisine: American
Description
This Vanilla Bean Cheesecake captivates with its creamy texture and delightful vanilla flavor. Perfect for special gatherings or cozy nights at home!
Ingredients
- 11 oz Nilla Wafers, 1 box
- 1/2 cup Unsalted butter, melted
- 24 oz Cream cheese, room temperature
- 3/4 cup White granulated sugar
- 1 TBSP Vanilla bean paste, or vanilla extract
- 1/2 cup Sour cream, room temperature or greek yogurt
- 1/4 cup Heavy cream, room temperature
- 4 Large eggs, room temperature
- 4 oz Cream cheese, room temperature
- 4 oz White chocolate bar, I used Lindt
- 2 TBSP Heavy cream
- 1 cup Heavy cream
- 1/4 cup Powdered sugar
- 1 tsp Vanilla bean paste
- 1 cup Heavy cream
- 1/4 cup Powdered sugar
- 1 tsp Vanilla bean paste
Instructions
- Preheat the oven to 325℉ and prepare a 9-inch springform pan by spraying with nonstick baking spray and lining the bottom with a circle of parchment paper, then spray again.
- Blend the Nilla Wafers in a food processor until fine crumbs form. In a separate bowl, combine the crumbs with melted butter and mix well using a fork.
- Transfer the mixture into the prepared pan. Press the crust halfway up the sides firmly using your hands and compact it further with the bottom of a measuring cup.
- Bake the crust for 11 minutes.
Notes
Room temperature ingredients help achieve a smoother batter and a creamier cheesecake.
For a richer flavor, use high-quality vanilla bean paste.
Let the cheesecake cool completely before refrigerating for best results.
Nutrition
- Serving Size: 1 slice
- Calories: 354
- Sugar: 17g
- Sodium: 300mg
- Fat: 27g
- Saturated Fat: 16g
- Unsaturated Fat: 9g
- Trans Fat: 0g
- Carbohydrates: 27g
- Fiber: 0g
- Protein: 4g
- Cholesterol: 100mg